Working as a gunsmith requires some specialist equipment, sometimes the most basic of jobs requires a specialist tool. Replacing a firing pin is a simple task but sometimes requires a specialist tool, many side by side guns have “disc set strikers” which is to say the firing pin is set into the action from the standing breech of the action and secures with a threaded inset; the “disc”.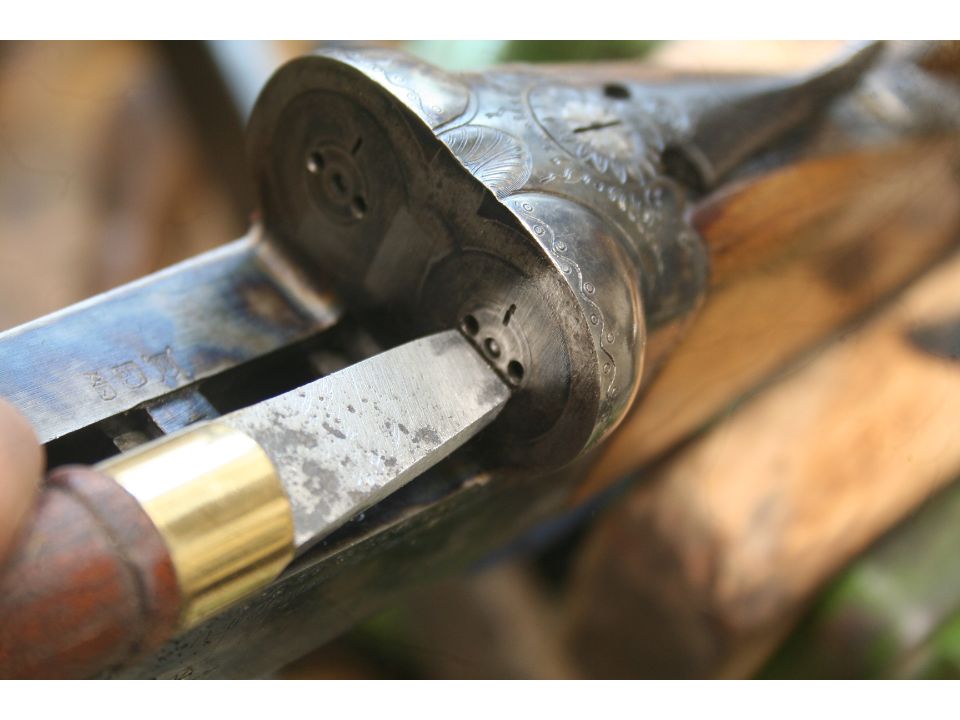
As with many things shotgun there is seemingly no standard, you cannot simply go down to Screwfix and buy a tool for removing the discs even if you could you’d quickly find that the tool that fitted an AYA would not fit a vintage side by side. Faced with these problems some of the time on a job is given over to tool making, I keep a few blank steels in handles for these jobs. I was once told by an old hand in the trade, a good gunsmith should be a good tool maker; I’m not sure I can claim to be the latter however these tool making tasks are common in the workshop and are a good time to exercise some file work basics that I employ to make tools quickly and efficiently in the workshop.
File work 101.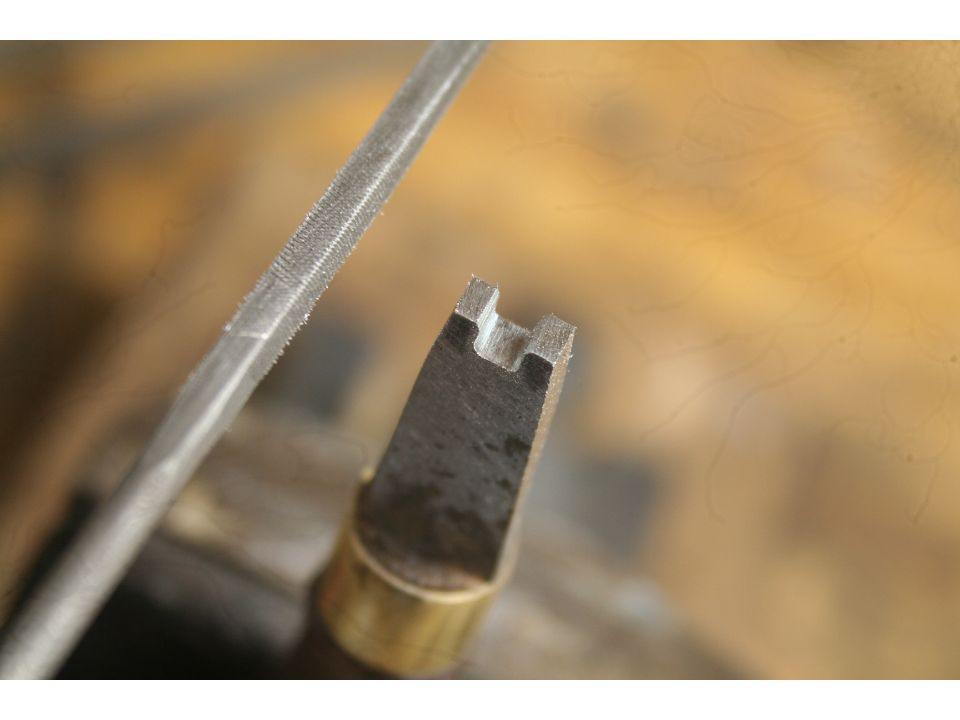
There are lathes and mills and tool grinders in the workshop but not only is there great joy to be had working with hand tools, it’s often quicker and less complicated than setting up various cuts on machines. Files and a good vice are employed every day in the workshop at one point or another, so it pays to use good quality files and to look after them; growing up in my father’s home workshop we had an eclectic mix of cast of and hand me down files in various states of decay, I grew up never knowing what a sharp file was worth, it was only when I began gunsmithing in my teens and I invested in some entry level files that I learned to look after my files; so my first bit of advice for anyone with a workshop at home is to throw away their old rusty files that have spent the last 40 years sliding over each other in drawers – or better yet repurpose them into other tools though that’s another article in its self.
New files sliding around in drawers are no good either – make yourself a file rack to hold and store your files in to keep them from knocking against each other and to have them in arms reach from the vice. When buying files know that files for normal work come in three cuts, Bastard (very course), 2nd cut (coarse) and smooth (fine), there are specialist files for all kinds of other work but we are going to concern ourselves here with using some basic files to achieve a basic job.
My file rack leaves only the handle showing, so I wrap electrical tape to denote the type of file it is by a colour code – Bastard files are wrapped with red tape , second cut with blue, and smooth files are left bare, it’s a simple solution that saves tedious searching, a further colour code could be used to signify the shape of the file but I’m not there yet!
When using files I was always taught to use the largest file you can to remove the bulk of the material needed, the courser cut, heavier weight and longer stroke of a larger file will remove material more quickly than a smaller file for our striker removal key I employed a large 10” three square bastard file; filing in the centre of our tool blank I cut a “V” notch, this quickly achieves two things, the bulk of the material is removed from the centre of the tool meaning there is much less to remove with the smaller four square file, it also establishes the inside edges of what will become the two pins.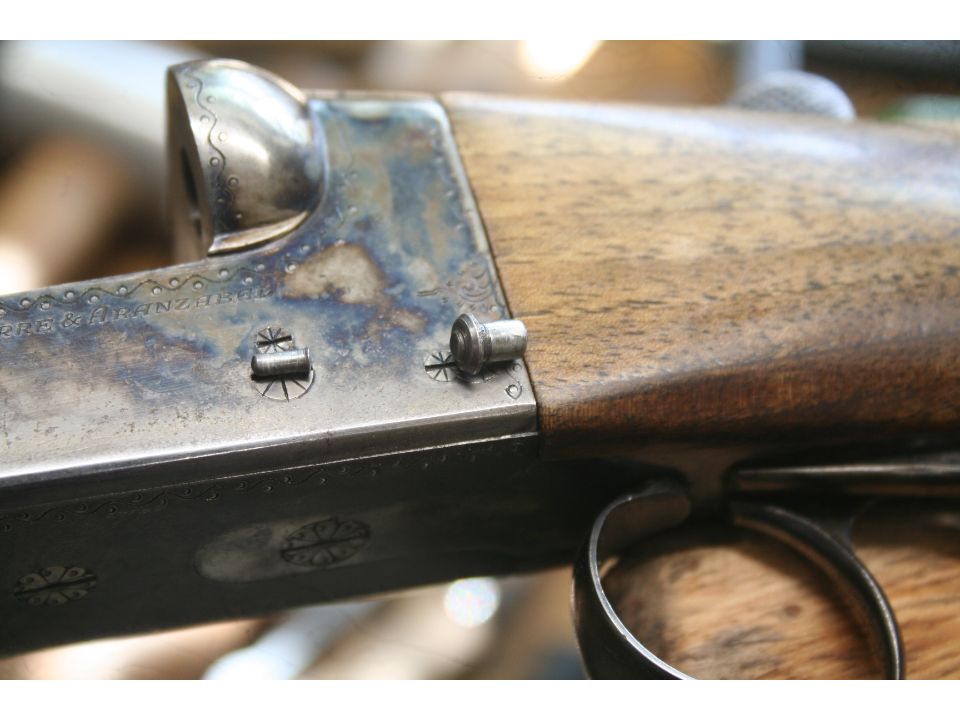
The V notch is cut square with an 8” bastard cut four square file more suited to the necessary width between the two pins. I continue to use this file to roughly establish the pins in a square profile to be rounded off with needle files. At this point it’s worth mentioning another useful trick when using files, its sometimes handy to grind the teeth out of one edge or a three and four square file, this gives you safe edges which you can run up against surfaces you do not wish to file, but allows you to utilise the shape of the file to achieve the intended result. As we get closer to the roughly finished profile the whole lot is tidied up with 2nd cut and then smooth files, in any work where a fine surface finish is essential rubbing chalk in to the teeth of you 2nd cut and smooth files prevents metal from getting stuck in the file teeth and galling your work.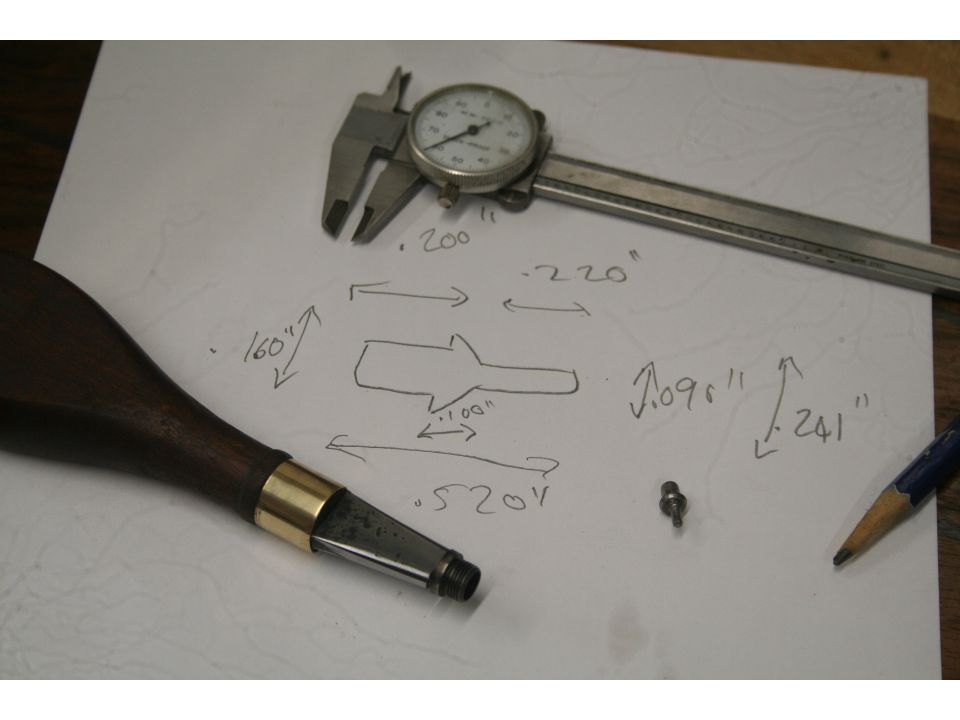
To finally establish the pins a needle file can be used to remove the corners from the square pegs and dress them round, if needed emery can be used to clean up any hard to reach areas. These file work tips can be just as gainfully employed in every imaginable circumstance. Working as a gunsmith I have the benefit of working with my hands every day, which Is something that gives me so much joy which is in turn the cause of my commitment to this line of business the process of filing out this tool probably took less than 5 minutes but is something the customer almost never sees when he leaves his gun at the gunsmiths.
Published by Vintage Guns Ltd on (modified )