When Bob showed me his W&C Scott 12-bore pigeon gun, we hatched a plan to restore it to make it into his ideal sporting clays tool. The gun turned out to be rather special. It belonged, according to some engraving on the barrels, to famous American pigeon shooter Capt. Brewer.
The record books suggest the serial number approximates to the year 1904, which is at odds with the 1897 inscription on the barrel. We can look to the proof marks for further help with dating. The London Proofs on the flats bear the NP with arm holding scimitar above, denoting 1904 rules of proof, as well as indicating CHOKE in both barrels and a load marking of 1⅛ oz.
This information backs-up the serial number dating and throws some question on the 1897 inscription. The 30” barrels are further marked W&C Scott & Son ‘The Premier’ with the London address of 78 Shaftsbury Avenue, at which Scott resided from 1900-1921. All this evidence suggests a date of manufacture later than that suggested by the inscription on the underside of the barrels. How could Brewer have shot 100 straight at Dexter Park in 1897 with a gun made seven years after the event? It is all most interesting and a mystery I am unlikely to solve conclusively. Perhaps he, or another engraved the information of a previous match on a later Brewer gun.
The price list of W&C Scott guns shows the Premier model, in 1897, at £68 (wholesale) as a hammer gun; significantly less than the Premier hammerless gun at £82. These prices were maintained until the 1920s. The Premier was sold as a hammer gun from 1873 to 1921. It features Scott’s ‘Improved Bolt’ of 1892 in addition to the Purdey double under-bolt of 1863. The three bolts are all operated by Scott’s patent spindle and top-lever of 1865. Mechanical function, materials and finish are all impeccable and the mechanism feels as solid and perfectly aligned today as it would have over a century ago.
The new chopper-lumps had to fit perfectly into the 1897 action.
Engraving is very fine quality full-coverage scroll. The grade could be further embellished with carved relief engraving and some game scenes or pigeons. The Whitworth steel barrels are of dovetail lump construction, with a stippled, concave rib. The Premier was certainly a ‘best’ gun, just one step down in finish from what we would consider ‘exhibition grade’, or ‘presentation grade’, as some gunmakers preferred to call it.
So, having assessed the gun’s provenance, quality and condition, we had a job on; it needed proper restoration.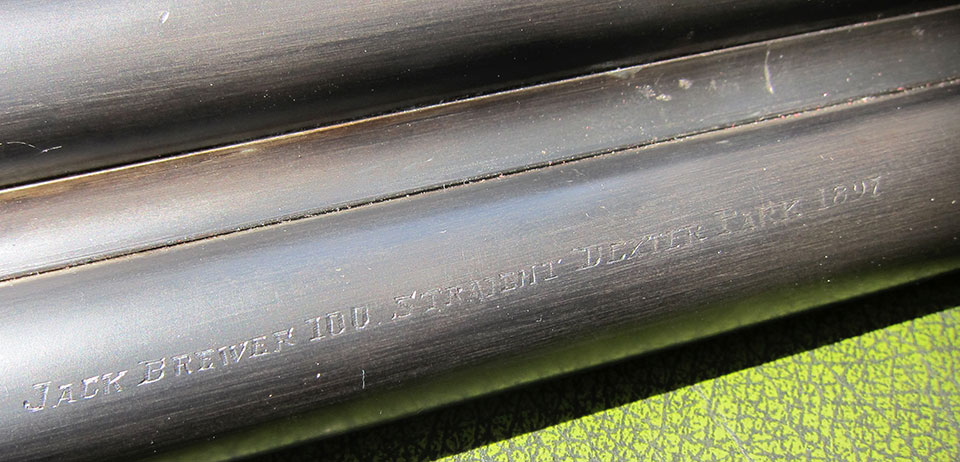
We contemplated simply trying a re-stocking job, retaining the original barrels and renovating the rest of the gun. Bob went off to find the seller, with a price in mind. He did the deal at a figure agreeable to him and I collected the gun at the Southern Side-by-Side Championship at Deep River a couple of months later. After a chat, Bob decided he would take the plunge and go all out to make this exactly the gun he had always dreamed of. Instead of holding on to Brewer’s bent, old barrels, Bob would invest in best new chopper-lumps at 32” with a full set of Teague chokes (ten in all) to cover all eventualities. I brought the Scott back to London to begin the project.
Steph understands English stock shapes and works to exacting standards.
There were a number of considerations to grapple with. First the specification of the job, the allocation of the work and some historical research. The project involved a sequence of work and a different gunmaker taking the gun through each stage. I had to project manage barrel making, choke cutting, actioning, re-proofing, fitting, re-stocking, finishing, blacking, engraving, casing and delivery. It would prove quite demanding but very interesting. The first port of call was Scott, the barrel maker.
Barrel Making
Some people imagine it is simply a matter of making a call, ordering tubes of whatever length you desire and having a chap make you the barrels. Think again. I was not going to use Spanish tubes as the quality is horrible. Italian tubes are a bit better but they rust too easily and also lack the quality of the best English tubes. However, English tubes are hard to get, they are made in small quantities, the bigger firms tend to monopolise orders and getting non-standard sizes is really quite hard. The tubes I wanted for the Scott had to accommodate the long bar (3” barrel flats with lumps measuring ¾” rear and 1⅜” front) and they had to be 32” long. Additionally, we had to make 32” ribs, as finding them from stock anywhere proved impossible.
With tubes supplied, Scott machined the barrels and lumps to fit, brazed them together made and fitted the loop, rough chambered them, fitted the ribs and struck them up, leaving excess metal where the actioner would need margins to work with. When making fitter-in barrels, the barrel maker has to be keenly aware of the dimensions of the old barrels. They will have to fit the existing action and forend.
Actioning
From the barrel maker, I took the gun to the actioner, along with the old barrels, which will be interchangeable. He had to work out the angles for striking, get the flats filed to the right thickness, file the loop, line up the chambers, machine the correct angle to the flats, the lumps and the loop, making sure all are centred.
The finished stock.
He then cuts the cross pin hole and cuts the lumps to fit, cuts the bites in the lumps and the loop. He makes off the barrels around the breech, shaping into the side-clips and extractors. From here, the gun went back to the barrel maker for rims and chambers to be cut. Nigel Teague then fitted the ten chokes Bob had asked for and sent the gun back to Dave, the finisher.
Proof
Dave jointed it, ready for proof. It then went to the London Proof House and was subjected to London standard nitro proof for 2 ¾” chambers. It passed and was returned to Dave for freeing off and blacking down onto the action. When submitted for proof, a gun should always be very tightly gripped; far more tightly than you would want to use it.
Dave then machined out the first lift cam slot for the extractors, fit the forend iron, cut under the loop and fitted the forend wood to the new barrels, using smoke black. He then made the forend push-rod fit and function in the new loop.
Barrels and action then went back to barrel-maker Scott for final striking up, fine finish and smoothing.
Fitting and Stocking
With new stock and re-worked forend, the gun looks ‘right’
Bob had specific stocking requirements. He has a deceptively large frame, with thick neck, developed upper arm and chest muscles and a broad head. He likes a recoil pad and decided on a straight-hand stock, being careful to remark that he did not want a Monte Carlo type profile to it.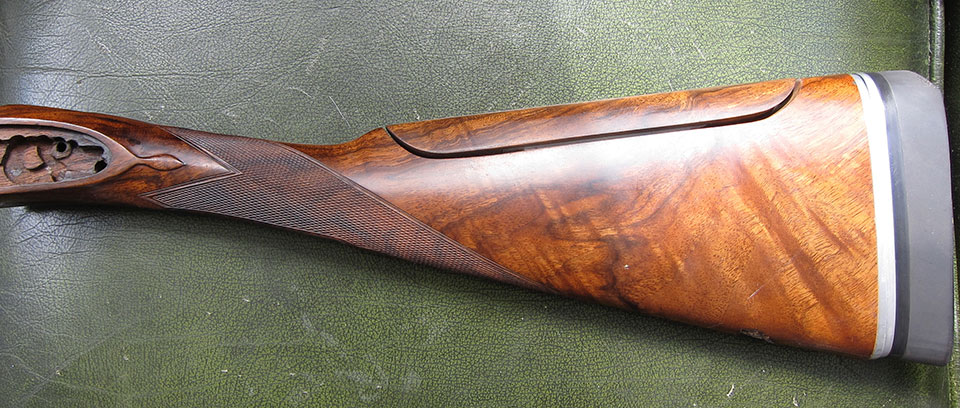
In the UK, I would normally send the client to Mike Yardley for a fitting. Bob, however, was in the US, so I arranged for Chris Batha to do the honours. This he did and provided a very detailed fitting instruction, which I discussed with Bob, and with the stocker, Steph, before making a final plan of action. Bob needed a swept face and a profile that was close to central vision. Chris noted that Bob likes to float his target and likes a pattern delivery of 60% high, 40% low. The final dimensions we settled in detail.
Once we were clear on the dimensions and characteristics of the stock, we had to choose a piece of wood. I suggested one or two candidates but was personally keen to push Bob towards a classic piece of well-figured walnut, which I felt would complement the style of the Scott. It was expensive, at £1,200 but good wood is expensive and selecting it is harder than most people think. Cheap wood is available and people often think they can buy a bargain and save some money. All too many of these ‘bargains’ crack after a couple of years or are horrible to work, or just lack the quality necessary to justify the cost of the stocker.
Engraving mirrors the original barrels.
Bob went with my suggestion and Steph stocked the gun, fitted the leather pad and cut the drop-points. He retained the original pins and screws, except the guard screws, which he made new but left as ‘slaves’ for the finisher.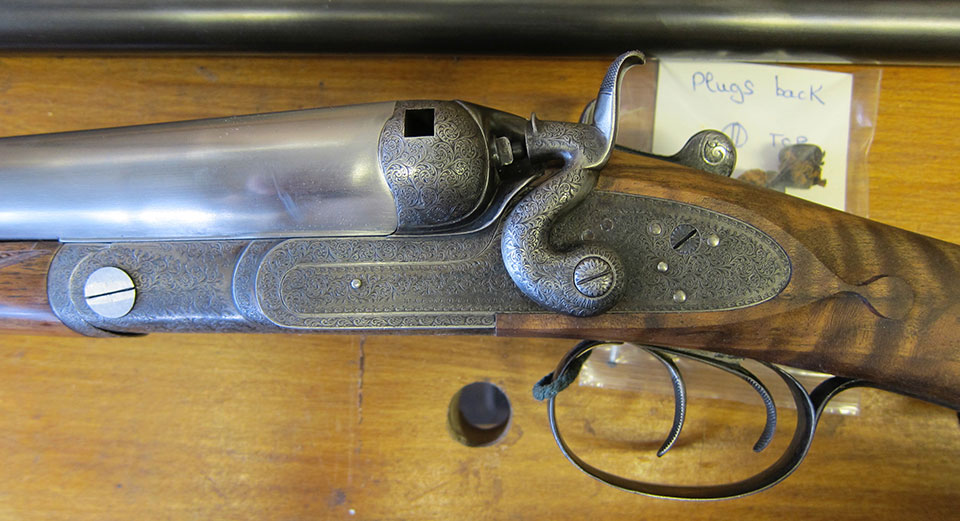
Finishing
After Steph had done his work, the entire gun went back to Dave for finishing. He used the original stock to match the chequer borders, size and shape. He chequered the hand, coloured and oil-finished the stock, made off the screws and hinge-pin, finely bedded the bolts and lever-work and ensured all mechanical operation was functioning perfectly.
Engraving & Blacking
Everything now works and looks exactly as it should.
The hinge pin was engraved by Dave Tallett, to match the action, guard pins likewise. The breech ends of the barrels were engraved to match the originals. Dave replicated the lettering on the original tubes. Pins were blacked and the barrels then sent to the blacker. New barrels cost more to black than old ones, as the process takes longer. Once back from the blacker, they were polished and oiled.
As we stand, the gun is being fitted into a period case, with Scott trade label, both sets of barrels, period tools, rods and accessories. I hope Bob likes it.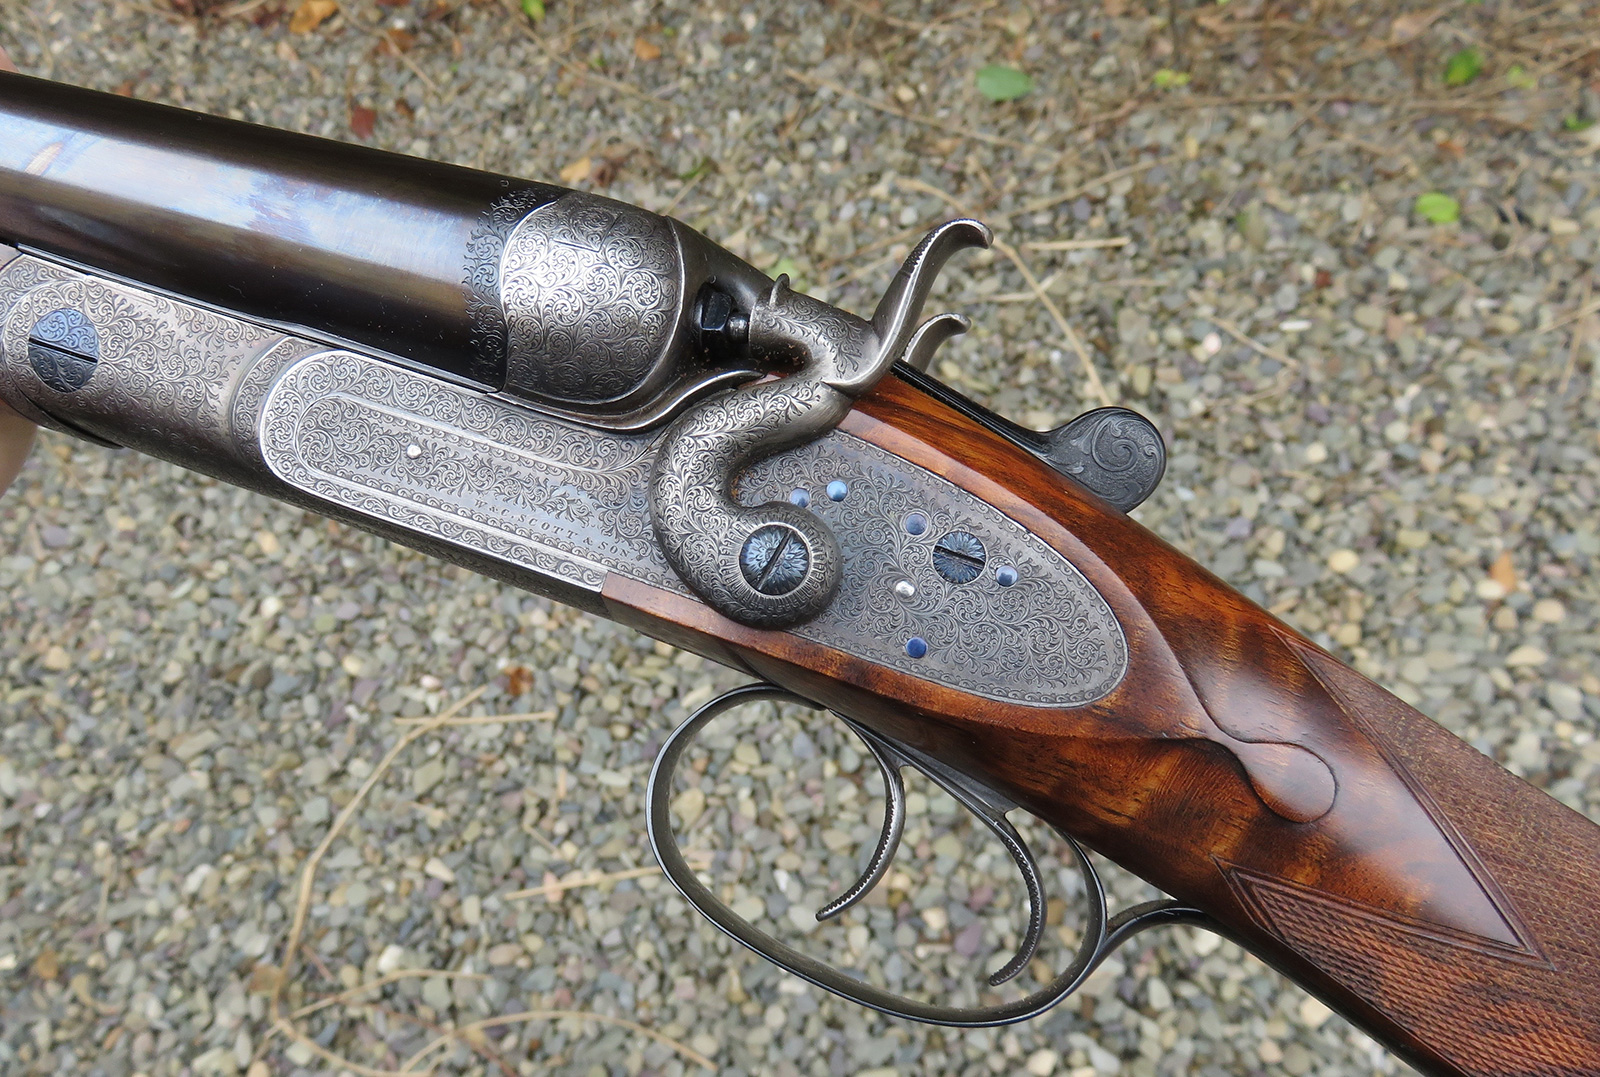
Published by Vintage Guns Ltd on (modified )